


Here we'll show you how to create your own professional signature of Gmail.
Email signature here is not your signature, email signature that is automatically part of the information always appears at the end of an email content. You just set up once and signatures will be automatically added to the email system at the end of each email content to send mail.
Most users will want to create their own email a mail signature true professional with basic contact information needed when sending emails to recipients. However, it is difficult if you do not have "appeal" to create their own beautiful 1 signature, also known as creative.

Understanding this problem, online services HTML Email Signature Generator was born with the main features to help users create a signature for a professional email with full background information for the contacts when sending email .

You'll be taken to the communications setup. Here you will be provided with the communication frame quite sufficient to cover the Main tab (section information)
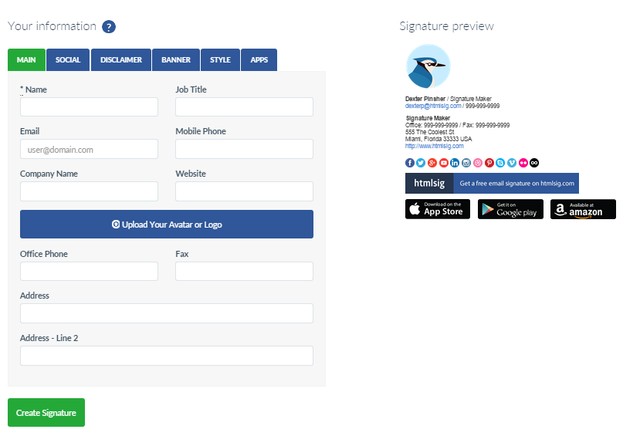
Social (link your social network), Disclaimer (regulation of content - you can click No to skip it)

Banner (can understand this is your banner image), Style (custom display of color, font, ...) and Apps (links section of individual applications your organization can use when you register yourself an account on HTMLSig).

After you have filled in the information, you click on the Create Signature to start the initialization signature. After the initialization process is finished, you will be taken to a page with an email template Preview the signature that you've created below. If not satisfied, click Edit to edit again, even if you like, you click Show the source code to retrieve the HTML embed code or Download to get the signature file in the software used email clients like Thunderbird his feet.

Here we will drag the text blacked signature in the preview pane on the right, note just copy the contents of the information that interests you.

Proceed to access your Gmail account and click Settings

In the Settings interface, you will find the custom Signature line in the General tab and paste text Copy signature above the target. Then click Save changes to save.

That is the article we want to show everyone that have created for themselves a true professional signature. Hopefully the article will be useful to you.
See more : Gmail Chat


0 comments:
Post a Comment